Showing posts with label NaBloPoMo. Show all posts

Friday, November 19, 2010

Freebie Friday - Winner!

The winner is...
List Randomizer

There were 9 items in your list. Here they are in random order:
  1. Raggedy Ann
  2. Pixie
  3. Kimberly R.
  4. Ashley
  5. Liz
  6. Blu
  7. Karen
  8. Robin
  9. Tim
Timestamp: 2010-11-19 23:16:59 UTC

Congratulations to Raggedy Ann!  I've been following her on Twitter pretty much since I joined, and she has a great blog as well.  I'll send your e-mail address to the promo person at CSN, and she'll e-mail you your gift certificate code.

For today's freebies, I thought I would share a great cross stitch and needlepoint designer I found (yes, again) on Twitter - http://happythreads.com.au.  Her posts are full of happiness and joy, and so are the freebies she frequently posts.  Here's one I love - a blue sky and a green meadow.  And if you're looking for a quick stitch to put you in the Christmas spirit, here's her newest freebie.  She has designs for sale as well, and she makes gorgeous cards.

Thanks to everyone who entered the CSN giveaway.  To my new followers, I hope you'll stay with me even though this giveaway is over.  There may be others in the future! :)

Thursday, November 18, 2010

Beauty Day!

Welcome to my new followers!  Last call for the guest giveaway - I pick the winner tomorrow!!!

So today we come to talking about anti-aging products.  There are a lot out there.  The fact is, a lot of them have really good science behind them.  The key is finding what you like, in your price range, that works for your skin. Another important point I want to make is that you should treat your throat and hands the same way you treat your face.  The eyes, throat and hands are the first 3 areas of a woman's body that shows aging.  So be sure to use whatever skin care products on your throat and hands.

Like I said last week, I'm all about botanical products.  Aloe Vera is one of the best botanicals in the world, because it penetrates to the inner layers of the skin, and carries with it anything that's mixed in.  It's a unique plant, and that's the reason it's been used for centuries to heal burns and other wounds.  There, now you know why mom (or grandma) always told you to put aloe on your sunburn. ;)

Now for some science stuff.  Some of the most cutting edge products include peptides, hyaluronic acid, and even nano-technology.  I'll leave the nano-technology alone, because it's way too much to understand.  But I will talk about the other two.  Actually, both peptides and hyaluronic acid are naturally occurring in the skin.

Peptides are simply a chain of amino acids.  Amino acids are the building blocks of cells.  What these chains do depends on how many amino acids are in the chain.  Some chains (hexapeptides) specifically tell the skin to make more collagen.  Collagen production in the skin drops off around the age of 35.  Without adequate collagen, we lose firmness in our skin, and it starts to sag.  By applying an anti-aging product that contains these peptide chains, you can tell the skin to make more collagen.  These are the chains that skin care manufacturers put in their products.  (The most common brand name of hexapeptide is Argireline.)

Hyaluronic acid is the primary ingredient in some injectable wrinkle treatments.  But it is also found in topical anti-aging products.  It can also stimulate the production of collagen, but has a side benefit of causing the skin to hydrate itself.

These are both ingredients that work very well at reducing the signs of aging.  But like anything else, if you want results you have to keep using them.  Skin care has to be a part of your daily routine in order to see lasting results.

Wednesday, November 17, 2010

Tutorial Wednesday

It just doesn't sound the same, lol.  I am feeling much better, thank you.  I even had a fun stop-in at my LYS, looking for the elusive blue and orange yarn.  She will order them for me, and I should have them by December 1.

In keeping with last week's Hardanger theme, here is a link to a post I did in the past about the star motif common in Hardanger.  This motif can be incorporated in any number of designs.  I know I promised a tutorial for the ship, and as I'm sitting here trying to write it, I realize I don't have the pictures for it that I was sure I'd taken.  So I will show you some examples of how I've used this motif instead.  A ship is basically a star with 4 funky arms.

This was my first attempt at understanding the directions I found.  You'll see that I put them together to make a cross shape.  To make an actual ship-shape, the "funky arms" should be on the side portions, with the star points at the top or bottom.

This shows another use for those "funky arms" - flowers!  You can also see what can be done by making only half of the star motif.

I am motivated now to stitch a ship and take pictures of it - I can't believe I lost those!!!

Tuesday, November 16, 2010

Tutorial coming tomorrow

We'll just swap out Family Day and Tutorial Day this week.  This week's family update - the stomach flu hit my older daughter and me last night.  She got it worse than I did, unfortunately.  It looks like she's going to miss another day of school tomorrow, while I hope to be feeling close to 100%.  I was even well enough this afternoon to go help my friend with the baking.  Hopefully my brain cells will be back to 100% as well.  I'm having a hard time focusing on anything right now.

Stay healthy, everyone.

Monday, November 15, 2010

Heavy Sigh

Sunday is my downfall.  Which is why I was going to do Wordless Weekend.  But I didn't have a pic in mind.  I had all kinds of time yesterday afternoon, too.  DH and the girls went on a swimming party, and I had 3.5 hours of peace and quiet.  Plenty of time to catch up on the DVR and crochet some sleeves.

I've finally decided on a yarn for DH's socks - he wants black and silver, he's getting black and gray.  I finally convinced him that it is in fact difficult to find solid/metallic worsted yarn that is an 80/20 acrylic/wool blend - in enough quantity to make 2 pair of slipper socks, for less than $50.  So Lion Brand Wool-Ease in 2 different colors it is.  I'll also be making him a pair in blue and orange (Boise State colors).  So I need to finish up my sweater so I can get onto the rest of the socks.

It's the start of a busy week...which is really the start of a busy season.  Tomorrow I will spend the day with a friend from church, baking items for our bake sale on Sunday.  Then it's Thanksgiving (I'm not cooking this year!!!!!!!), then decorating, and deciding on birthday party plans, and at some point DH's cousin is coming to visit.  I'm getting excited for the holiday season this year.  I haven't been excited about it for a couple of years.

I hope you all have a wonderful week.  Remember, the drawing for the CSN gift card is this Friday!!

Saturday, November 13, 2010

My Week In Stitches

No pictures this week.  It's too dark in my house this evening, and I'm too lazy to turn lights on just for pictures.

Monday - I finish-finished my brown socks (you've already seen pictures of them).

Tuesday - I put in about 1.5 rows on Fairy Sisters.

Thursday-Friday - I finished the "skirt" portion of my blue sweater.  I wish I'd taken a picture earlier, because it's been a while since I posted any pictures of it.  I also started the sleeves, and I'll work on them some more tonight.

I'm feeling really good about my sweater progress - like I might actually finish it before snow flies (and sticks).  It's still a little big around the middle, and I'm trying to figure out where else to tweak it.  I was worried that it would be too heavy, but when it's on it doesn't feel bad.

It's true, I skipped BoInk this week.  I'm hoping that when I finish my sweater, I'll be motivated to finish BoInk, too.  I'm really close.  What would I do with only one real WIP????

Friday, November 12, 2010

Freebie Friday

Happy Friday, everyone!  I'm getting ready for dinner and the BSU/Idaho rivalry game (go Broncos).  Just a reminder, if you haven't entered CSN's guest giveaway yet, you only have a week left!  Someone's going to win a $45 gift certificate, just in time for holiday shopping!

This week I thought I'd share some of my favorite crochet freebies.  I've said before, the online stitching community has given me so much, and I try to give back in my own way.  One of the ways I can give back is to share links to their projects.

The brown socks I just finished came from Mrs. D Crochets - they are her Intuitive Shell Socks.  I made them with a worsted weight yarn that was 80% acrylic/20% wool, so they're bulky, and more like slippers.  Awesome if your ankles get cold!

Another favorite crochet designer of mine is Kristine from Ambassador Crochet.  She is a Ravelry designer, she has a great Etsy shop, and she does  free stitch tutorials on her blog.  It's so fun to learn a new way to "bend" yarn.  Her most recent blog post is "Tips for Teaching Children to Crochet". Kristine is a great writer.  If you crochet, you should follow her!

Last one, because the smell of my chicken is making me hungry!!!  I follow Rachel from Crochet Spot on Twitter.  She has a ton of free patterns, including a sweater pattern designed by a 13-year-old crocheter.

Have a great weekend!!!! Did I say "Go Broncos" yet? ;)

Thursday, November 11, 2010

Thursday Beauty

So, I take it y'all like giveaways?  LOL

Happy Veterans' Day to my grandfather, cousin, husband, and many friends who have served or are serving in the US military.  Thank you for your service and your sacrifice.

This week, we're going to talk about the basics of skin care vs. make up.  One of the lessons I learned early on as a skin care consultant is that "no amount of make up can hide a poorly cared-for complexion."  Make up is designed to enhance.  That's all.  If your skin is in great condition, it will enhance your gorgeous skin.  If it's less than perfect, make up will enhance your flaws.

The only way to actually improve the condition of your skin (to make the flaws go away) is to wash your face and moisturize.  Start a regimen early enough, and you can prevent the signs of aging.  If the signs are already there, then you should consider using a firming serum.  As we age, our bodies don't make as much collagen, and without collagen our skin sags, forming wrinkles.  Next week I'll talk about anti-aging products, because it's going to take some research to make sure I'm providing truly up-to-date information for you.

So let's talk about cleansing and moisturizing.  It's super-duper important to wash your face morning and night.  Super-duper.  Even if you don't wear make up.  Our skin acts like a magnet for all the bad stuff in the air, and that bad stuff breaks up the bonds between skin cells.  Skin that isn't strong develops wrinkles.  Cleansing is the number one thing you can do to prevent the signs of aging.

Moisturizing is the second most important thing you can do.  Even if you have oily skin.  Oily skin is dry skin with an identity crisis.  Meaning, it thinks it's dry, so it produces more oil.  Use a moisturizer that is appropriate for your skin type - lightweight for oily skin, creamy for dry skin.  Moisturizers that include sunscreen are great for daytime use.  Make sure your moisturizer includes anti-oxidants - Vitamins A, C, and E.  These will help to provide a barrier against the "bad stuff" and protect your skin.

I always recommend a botanical-based product.  Stay away from anything that has "petroleum" or "petrolatum" in the first 5 ingredients.  Petrolatum is a by-product of processing petroleum - the oil companies sell it to skin care companies because it makes the products feel "nice".  But it doesn't actually provide any benefits to your skin.  Your skin is mostly water - petrolatum is mostly oil.  They don't play nicely together.  Plant-based products, on the other hand, have a lot of water in them.  They will talk to your skin in a way it understands.  The goal is not to just change the "appearance" but the condition of your skin.

If you're looking for a good botanical product, the line that I've used for over 10 years is called Aloette.  They have an aloe vera-based formula, and cleansers and moisturizers at different price points.  If you'd like more information about Aloette's products, please visit their website or leave me a comment (or both).

Wednesday, November 10, 2010

Wednesday is Family Day

This pic is for Cole - finished socks!  They go in family day because DH has decided he wants me to make 2 pairs for him and a pair for our neighbor.  Of course, he wants specific colors, and I'm having a hard time finding those yarns online.  Finishing these socks was the perfect way to end my Monday - you can see the empty bookshelves beyond my feet.  We spent the afternoon and evening rearranging the living room, and my feet were so tired!  All I could think about was sitting down and working on those socks!


Here are some more pictures of our rearranging (ignore the scarf and mitten mess, please...and the vacuum, and the blue painter's tape, and the lack of crown molding *sigh*).  We have an odd shape to our living room - it's long, with a 3-pane sliding glass door in the middle of one wall, and an opening to the dining room/kitchen on the other wall.  We used to have the TV where the white cabinet is, and my chaise where the brown cabinet is, and the couch angled out between the 2 halves of the room.  I had to walk around the end of the couch to get anywhere!
It's much cozier for sitting and watching TV, and I can look out the window from my desk and watch the squirrels run on the neighbor's fence.  An unexpected side benefit - there is no longer room for the girls to dance in the middle of the room.  All joy-filled dancing must take place in the open space behind the seating area - out of view of the TV.

Welcome to my new followers!  I hope you're enjoying what you find!

Tuesday, November 9, 2010

Tutorial Tuesday

Thanks to everyone who expressed sympathy over my foot yesterday.  It's feeling much better.  A bandage really does make it better!  Also, if you haven't yet, please go sign up for my giveaway!

Now, on to the tutorial(s).  I'm providing links to the Hardanger tutorials I've done over the past few years.  You can start from the beginning, or jump in wherever you'd like.  As I've learned different forms of needlework, I've discovered that many techniques cross over.  Enjoy!

Lesson #1 - Hardanger Background and Shopping Info

Lesson #2 - Can You Count To 5? (Klosters)

Lesson #3 - Larger Kloster Diamonds

Lesson #4 - Cutwork

Lesson #5 - Wrapping Bars

Lesson #6 - Woven Bars

Lesson #7 - Basic Filling Stitch

Lesson #8 - Filling Stitch #2 - Twisted Cross

Lesson #9 - Edging Technique - Satin Stitch

Lesson #10 - Edging Technique - Buttonhole Stitch (part 1)

Lesson #11 - Edging Technique - Buttonhole Stitch (part 2)

Monday, November 8, 2010

I Hate Computers Sometimes

My internet connection has been intermittent all evening!!  I almost didn't make it today!  Whew!

We had a self-inflicted busy day today.  DH and I rearranged the living room, moving my desk to the same wall as our sliding glass door.  This way, the sun won't beat down on my back.  And at some times of the day, I'll be able to open the curtains and look outside.  The rest of the furniture was arranged to make a more cozy seating arrangement.  It's also arranged in such a way that I don't have to move anything for Christmas. :)

So one good thing and one bad thing from today.  Bad thing first - while we were moving furniture, I found one of my tapestry needles with my foot.  Ouch.  It was apparently embedded point down (eye up) in the carpet, and I stepped on the eye with my heel.  My husband's comment: "That's a big hole."  Good thing - I finished my brown socks!!  I'm wearing them right now, and they're so snug and warm!!!

Saturday, November 6, 2010

My Week In Stitches


Sunday - Book of Ink Circles.  This is the 3rd "row" center motif.  And I think the end of my darker blue color.

Tuesday & Friday - Fairy Sisters.  I actually got 5 or 6 rows in this week.  The tops of the green threads are at row 50, and my goal for this month is to get through row 60.  Once I get to page 2, it actually starts to look interesting.

Wednesday & Saturday - brown sock #2.  Yes, that's a paper towel tube behind the sock.  I had to go looking for the second end of the yarn, and things got messy.  I was using a remote control to tame the yarn for a while, LOL.

Thanks to everyone who's entered my guest giveaway already - please click here to check it out and enter!

Friday, November 5, 2010

Freebie Friday - Guest Giveaway

I'm very excited to announce my first guest giveaway!  CSN stores has over 200 online stores where you can find anything you need, whether it be a chic handbag, children's luggage, or even cute cookware!  As I was browsing their sites, I found Christmas decor and beautiful wall art as well.  These sites will be a great resource for your holiday shopping this year, whether you're looking for the perfect gift or the perfect accent piece.  And one of MY readers will win a $45 gift certificate, good at any of CSN's stores!!!!

All you have to do to enter is leave a comment here, including your e-mail address, please.  Of course, I would love if you would become a follower here and on Twitter, and write about the giveaway on your own blogs.  But I won't make it a requirement this time. :)  This giveaway is open to residents of the US and Canada.  I will announce the winner on Friday, November 19.

Good luck!!!!

Thursday, November 4, 2010

Beauty Day!

Happy Thursday, everyone!  Most of you may not know, I've been a skin care consultant and make up artist for over 10 years.  I thought I'd share some of the tips I've picked up over the past 10 years.

The biggest problem people complain about (men, too!) in the fall is chapped lips.  When the air gets colder, and the heat is on inside, our skin is constantly exposed to dry air.  The skin on our lips is actually very thin.  When it's damaged, we notice it so much more quickly.  But you can heal the skin...and prevent the damage...with just a couple of easy steps.

To prevent chapping - the best tip I ever learned is to exfoliate your lips!  You can purchase products with granules that will slough the dead skin and moisturize at the same time.  Or, you can do something that's free. ;)  When you brush your teeth, take your damp (fully rinsed) toothbrush and gently massage your lips with it.  Just one pass on the top and one on the bottom, every day, should help to prevent the skin from cracking.  My younger daughter is more prone to dry skin, and I've used this trick on her since she got teeth, and her lips rarely chap.

Another tip to prevent chapping - stop licking your lips!  Your mom was right, you know.  Licking your lips will actually cause them to chap because the moisture will evaporate from the surface of the skin, and will also pull moisture out of the skin, leaving it drier than it was before.  To moisturize, use a non-scented, non-flavored petroleum-based balm.  You will never see me recommend petroleum-based products for any other area of skin.  But because the skin on your lips is so thin, you need something to seal them.  Avoid scents and flavors because a) they could irritate damaged skin and b) you will just be tempted to lick your lips more.

What about healing?  When my kids have chapped lips, I always have them use a damp wash cloth VERY GENTLY on the skin, to remove the damaged, peeling skin.  Then we apply a first aid cream.  We use an Aloette product called Visible Aid - you only need a tiny bit of this, and it moisturizes and numbs the area a little bit.  But you could also use a triple-antibiotic cream as well.  The point is to seal in some moisture and get the skin healing.

I hope this helps!  Next week we'll get into some more skin care tips.  If you have a skin care or make up question, go ahead and leave it here, and I'll try to answer it in a future post.

Wednesday, November 3, 2010

Wednesday is Family Day

For "family day" this week I thought I would show you our recent family project.  Every year, our church hosts a Harvest Party on Halloween, and the highlight is the Trunker Treat, where everyone lines up their cars and the kids go around the parking lot collecting candy.  Some people decorate their trunks, and it's a lot of fun.  My creative daughter came up with this idea last year:


So for this year, she wanted to make a garden.  Fantastic idea, we thought.  The kids will make flowers, it'll be fun. *sigh* What I failed to realize is that no one in the house likes to think about executing these ideas until the day before Halloween.  (When you're making a shark, you really only have to make the teeth.  Thanks to my aunts, we already had the fish and the felt water.)  Anyway, I sat the kids down a week before-hand to try to make a plan.  We were able to figure out how many pickets a fence would need, and that we would need to make "lots" of flowers. *sigh again*

Fast-forward to Thursday night, when Mommy has been crocheting flowers and handstitching yo-yo flowers, and cutting cardboard pickets, and no one else has done anything.  We realized we would have to change our plan, that we didn't have the time to make "lots of flowers" and figure out how to stand them up in the back of the car.  So we decided to make:

A teddy bear picnic!  I even downloaded the obnoxious song, and DH set up his laptop and played it over and over again.  We cut sumac leaves from the jungle in our back yard, and wrapped old curtain fabric around the hydraulic post-thingies to make trees.  My mom and the girls made the paper flowers - my mother decided the spare tire should be a Gloriosa bush.  We packed a picnic from the girls' play food.  You can see my crocheted flowers at the base of the "table" and my yo-yos at the base of the "bush".

Tuesday, November 2, 2010

Tutorial Tuesday - picture heavy

Before we get into the tutorial, just a quick reminder for those in the U.S. (as if you could forget) - today is election day.  Make sure you get out and make your voice heard.  No political recommendations coming from me, the great thing about craft is that we can set those differences aside and just work in common.  Hmmm, maybe we should send congress some yarn and crochet hooks???  Okay, enough of that - on to the fun stuff!

Some of you may remember MONTHS ago I was looking for a tutorial for a scissor pocket.  I found one that I really liked, but it was mostly text and not a lot of pictures.  So as I finished the project, I took a ton of pictures and promised to put them together for you.  Hey, at least it's coming in the same calendar year!

Scissor Pocket Finishing Tutorial
You will need:
- stitched piece
- lining fabric
- cording or lace for trim
- 3 pieces of cardboard
   * 1 slightly smaller than your stitched piece, 2 larger.  Because my stitched piece was a 4x4 square, I cut the small cardboard 3x3.  The larger pieces were cut 6x3 each.
- small piece of batting
- glue
- ruler
- box or craft knife
- scissors
- iron
- needle and thread

Instructions:
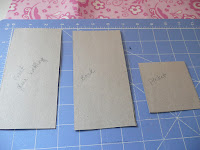
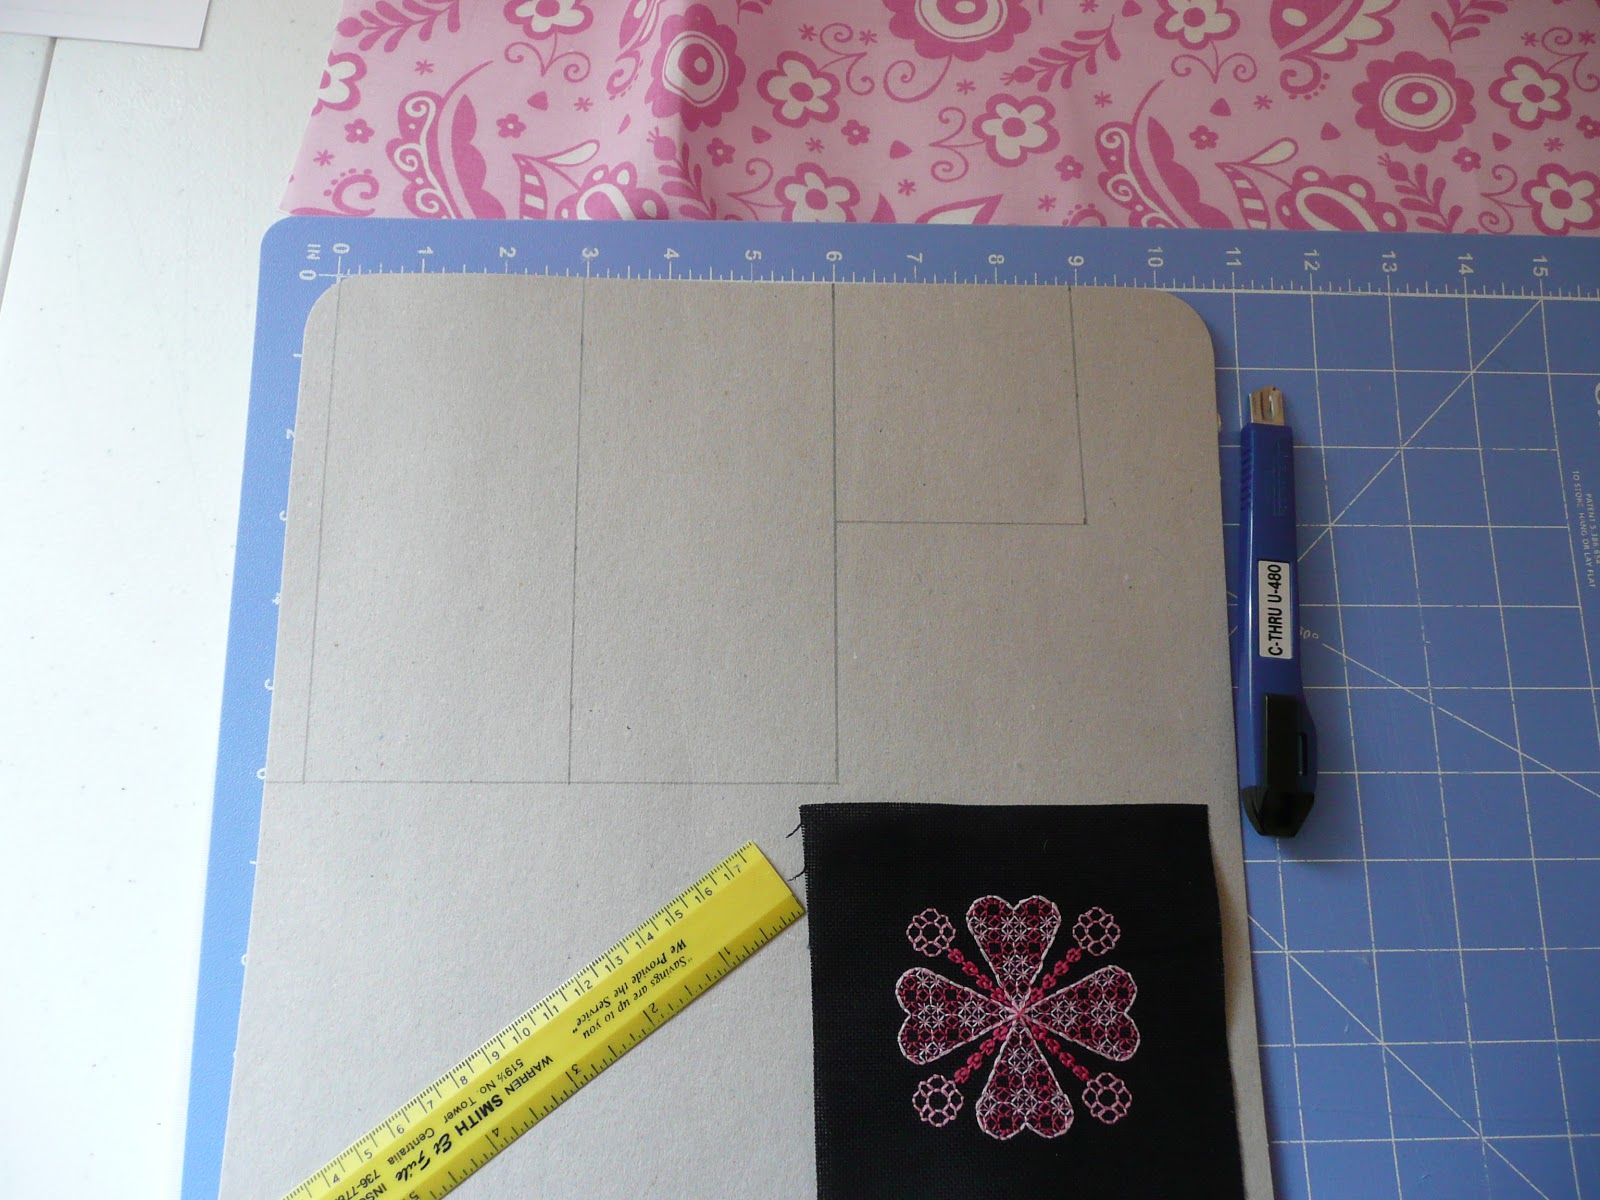
1) Cut your cardboard so that it is proportionate to your design.  I wanted 1/2 inch allowance on each side, so I cut my small cardboard 1 inch smaller than my stitched piece, then doubled the length for the backing pieces.  I suggest labeling the cardboard so you know which piece is which.  You will have one for the pocket, one for the very back, and one for the batting.
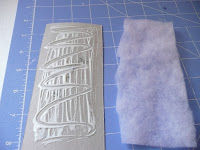


2) Glue batting to one of the large pieces of cardboard.  Set aside and allow to dry.

3) Cut 2 pieces of lining fabric 1 inch larger than back cardboard. (My cardboard is 6x3, so my lining fabric is 7x4)


4) Cut 1 piece of lining fabric the same size as stitched piece.


5) Turn stitched piece wrong side up and center pocket (small) cardboard over design.  Trace around cardboard on fabric, checking your centering.


6) Place stitched piece and small lining piece RIGHT sides together (stitched piece on top) and pin along the top only

7) Sew seam (thread color doesn't matter).  Trim & press seam open, flip right sides out, and press seam.
 8) Center pocket piece, making sure to tuck it into seam.  Leave cardboard inside.
9) Fold side and bottom edges of both fabrics toward lining piece and press (these edges will be tucked between the 2 larger cardboard pieces).

Set pocket piece aside.


10) Center "back" piece on one piece of lining fabric (writing side up - if your fabric is light colored, the words might show through).  Press edges of fabric around cardboard. (I like mitered corners, and I find pressing with an iron makes it easier.)  Run a line of glue near where the raw edge of the fabric will be, and press fabric in place with fingers, using a little extra glue at the corners.  Allow glue to dry.
11) Center front piece BATTING SIDE DOWN on the other piece of lining fabric.  Press edges of fabric around cardboard. (I like mitered corners, and I find pressing with an iron makes it easier.)  Run a line of glue near where the raw edge of the fabric will be, and press fabric in place with fingers, using a little extra glue at the corners.  Allow glue to dry.


12) Lace the back sides of your pocket.  Thread color doesn't matter.  Be sure to tack down the corners, then pass the needle back and forth between the edges, like lacing a shoe.  Wrap/weave the thread down the center of your lacing to secure bottom edge.  Slide the front piece inside the pocket so the lacing is against the exposed cardboard.

 13) Place your trim on the back piece - pin in place so the pins are pointing out, and GLUE, GLUE GLUE!!  Glue the trim in place, then apply glue to the exposed cardboard.  Center your top on your back, press hard, then find something heavy.
I like my husband's drill case. :)  Let it sit for an hour, then you can remove the pins.  Leave under the heavy object at least overnight, to be sure the glue dries thoroughly and bonds the front and back together.

DONE!!


Monday, November 1, 2010

Welcome to November!

I'm trying NaBloPoMo again - posting every day for the month of November.  I told you on Saturday I have a plan.  Really, I do!  So, here's what you can expect from me this month:

Mondays - will probably be my fly-by day (like this) - just checking in, maybe a thought provoking question if I have one. :)
Tuesdays - tutorials - I have one finishing tutorial ready to go, and I'm thinking about reviving the Hardanger tutorials
Wednesday - family day - for those of you who want to see how our trunk turned out, and things like that
Thursday - beauty day!  Way in advance of the holidays, because if you're like me, you find the tips you need 2 days after your event.
Friday - freebie day - I will look for some great designs or ideas and post links
Saturday - My Week In Stitches (of course)
Sunday - wordless weekends - I promise, I'll try really hard to NOT type something to go along with the pictures!

Is anyone else participating this month?  Or have you been successful in previous years?

Tuesday, December 1, 2009

So I failed...

miserably at NaBloPoMo. *heavy sigh* BUT I posted more than I would have without that little incentive, so it's still a success. Congrats to those who made it all the way through!

So this month, I managed to stitch 4.5 ornaments. More, actually. Because I got 2 ornaments to the point of finishing before I figured out that they wouldn't work. :(

Snowflake-themed ornament set:
blackwork humbug, Hardanger & blackwork biscornu, and beaded snowflake (which may look VERY familiar to some of you)


Peppermint-themed ornament set (so far):
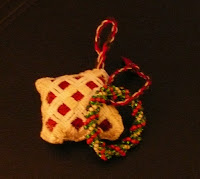
"star mint" biscornu and candy cane spiral-rope ornament (or a wreath)
I'm stitching a humbug for this now, but it's a little more tedious, and I think I'll need to get more green thread.


And a look at our Christmas tree! This year it's upstairs. Last year I just couldn't get in the holiday mood, and barely had any decorations up. But this year, we put the tree up after Thanksgiving. The outside lights are even up - we were the first on the cul-de-sac to decorate! And I'm mostly done with shopping for the kids. I went to Target at 11:30 on Black Friday, and was done in an hour. Didn't get the door-busters, but I still got some good deals, without all the hassle. :)

Saturday, November 21, 2009

Saturday update

So today's update has progress and...a finish!!!
First, BoInk. I completed the upper-center motif - kind of like a phoenix, I think. So the whole upper portion is DONE!!!!!!!!! I also started the yellow frame on the right-hand cross. Hallie was looking at this piece and noticed the large crosses, and I said, "Look at the squares, there are crosses between the stitches." She looked closer and found a bunch of them!

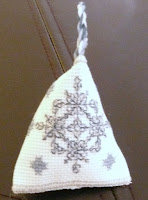
And my finish. #1 of the 3-part snowflake ornie set - a humbug! I decided not to participate in the TTE2 humbug exchange, but the finishes have been so cute, and I like how the large center snowflake wraps around the front. I also finished the biscornu ornie, but I forgot to take a pic. I'm also thinking that piece #3 will be a beaded snowflake, if I can remember where I put them. :)

And in a case of my "best laid plans", I'm also ready to start finishing the minty ornies. So I went to find my Peppermint Oil (we've had it since Hallie was a baby, something about my grandmother used to give babies a taste of candy canes when their tummies were upset...), and guess what. I couldn't find the Peppermint Oil. We've had it for almost 7 years, moved it umpteen times, and THIS time I can't find it when I finally have a use for it. Fortunately, the spiraly-ness and the color scheme are strong enough to convey that it should smell like mint. Besides, peppermint oil doesn't really smell like a candy cane, I need spearmint or wintergreen or something. (This is how I justify things in my real life, too...)