Some of you may remember MONTHS ago I was looking for a tutorial for a scissor pocket. I found one that I really liked, but it was mostly text and not a lot of pictures. So as I finished the project, I took a ton of pictures and promised to put them together for you. Hey, at least it's coming in the same calendar year!
Scissor Pocket Finishing Tutorial
- stitched piece
- lining fabric
 - cording or lace for trim
- 3 pieces of cardboard
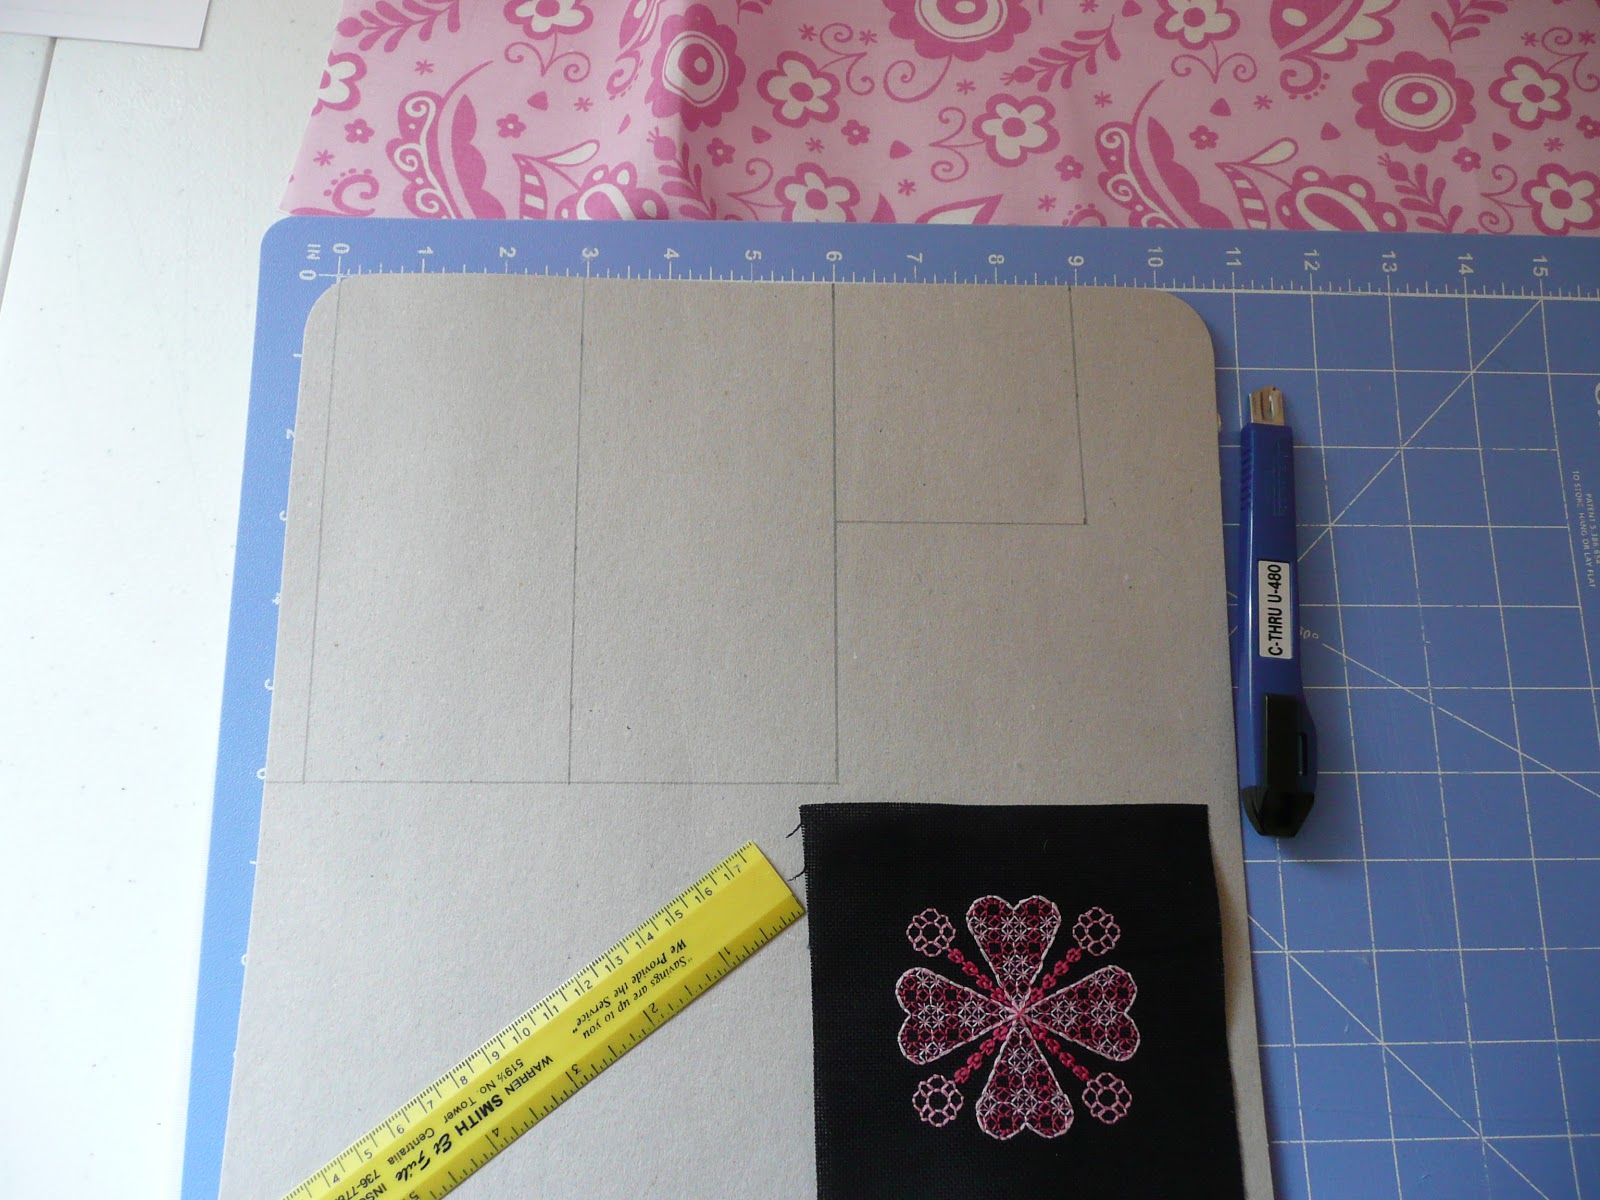
* 1 slightly smaller than your stitched piece, 2 larger. Because my stitched piece was a 4x4 square, I cut the small cardboard 3x3. The larger pieces were cut 6x3 each.
- small piece of batting
- glue
- ruler
- box or craft knife
- scissors
- iron
- needle and thread
Instructions:
 1) Cut your cardboard so that it is proportionate to your design. I wanted 1/2 inch allowance on each side, so I cut my small cardboard 1 inch smaller than my stitched piece, then doubled the length for the backing pieces. I suggest labeling the cardboard so you know which piece is which. You will have one for the pocket, one for the very back, and one for the batting.
 2) Glue batting to one of the large pieces of cardboard. Set aside and allow to dry.

4) Cut 1 piece of lining fabric the same size as stitched piece.
 5) Turn stitched piece wrong side up and center pocket (small) cardboard over design. Trace around cardboard on fabric, checking your centering.
 6) Place stitched piece and small lining piece RIGHT sides together (stitched piece on top) and pin along the top only


Set pocket piece aside.


11) Center front piece BATTING SIDE DOWN on the other piece of lining fabric. Press edges of fabric around cardboard. (I like mitered corners, and I find pressing with an iron makes it easier.) Run a line of glue near where the raw edge of the fabric will be, and press fabric in place with fingers, using a little extra glue at the corners. Allow glue to dry.
 12) Lace the back sides of your pocket. Thread color doesn't matter. Be sure to tack down the corners, then pass the needle back and forth between the edges, like lacing a shoe. Wrap/weave the thread down the center of your lacing to secure bottom edge. Slide the front piece inside the pocket so the lacing is against the exposed cardboard.


DONE!!

3 comments:
Excellent tutorial! Thanks!
That's really cute! I love tutorials like this. They help me to be brave and try new things. ;)
This is awesome!!! Thanks for sharing!!!!!
Post a Comment