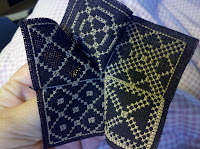
I made this my project for a Facebook weekend stitch-a-long, and finished the whole thing this afternoon. Yay.
If you haven't seen Lesley's instructions yet, you can go here. She has added a variation since I first started gushing over this idea, which makes points instead of a cushion. You have to see it to understand.
I chose to do a "traditional" 15-sided biscornu - that is one that looks more like the familiar biscornus made with 2 squares. As a reminder, here are my 15 panels:
Confession - I have a bad habit of cutting my biscornu squares too close to the backstitching. In this case it was because I was working on scrap fabric (why did I do that?) so the panels were really close together. Always leave at least 1/4 inch on each edge so you don't end up pulling out your backstitches as you attach.
Following Lesley's directions, and your input, I arranged the panels in a way that made sense to me, with 5 positives and 5 negatives, and the remaining 5 panels for the sides. Y'all know me, I'm terrible about taking pictures as I go (I tried, really I did), so I don't have pictures of both the top and the bottom after I stitched them together. Here's what I have:
This ultimately became the top. I tried to pick the patterns that "went together" the best. It makes a 5-pointed star, just like Lesley promised. This happens because with a 15-sided you match corner-to-corner (unlike a normal biscornu where you match corner-to-center) - except you force 5 panels to fit in this arrangement, which gives you the floppy, bendy look of a biscornu.
This is how it looks when you start adding side panels (note: I actually started stitching the bottom together, add added the side panels to that piece). The side pieces fold down like table legs.
And this is what it looked like as I was attaching the top to the sides that were already attached to the bottom. I'm really sorry that I didn't think to do the photos from the same angle! The cross and zig-zag panels are on the side, the mostly gold are the bottom, and the mostly black are the top. And see, I did manage to make it so the positive and negatives are exactly opposite each other.
Stuffing! I followed Lesley's suggestion and half-stuffed, then stitched down the middle with beads, then stuffed some more. Here's the reason that the mostly black became the top: because I did not leave enough of a margin around the backstitching, the panels on the other side did not join together properly, and there was a giant (okay, not giant, but E-bead-sized) hole at the corner where all 5 panels met. None of the backstitches pulled out, but I couldn't get them to meet correctly. Result: somewhat ugliness in the center. Also, it's really hard to stitch the last set of backstitches together.
Bottom ugliness. You can see the stitch straight across the hole to try to stabilize it.
Top
Side


No comments:
Post a Comment